How-To Guides
Step-by-step instructions for every KiXX Square feature
Professional Techniques for Faster Framing
Learn how to unlock the full potential of your KiXX Square. These guides are designed to help you work smarter and more accurately on every job.
Master the KiXX Square in Minutes
Select a guide below to see detailed instructions and pro tips
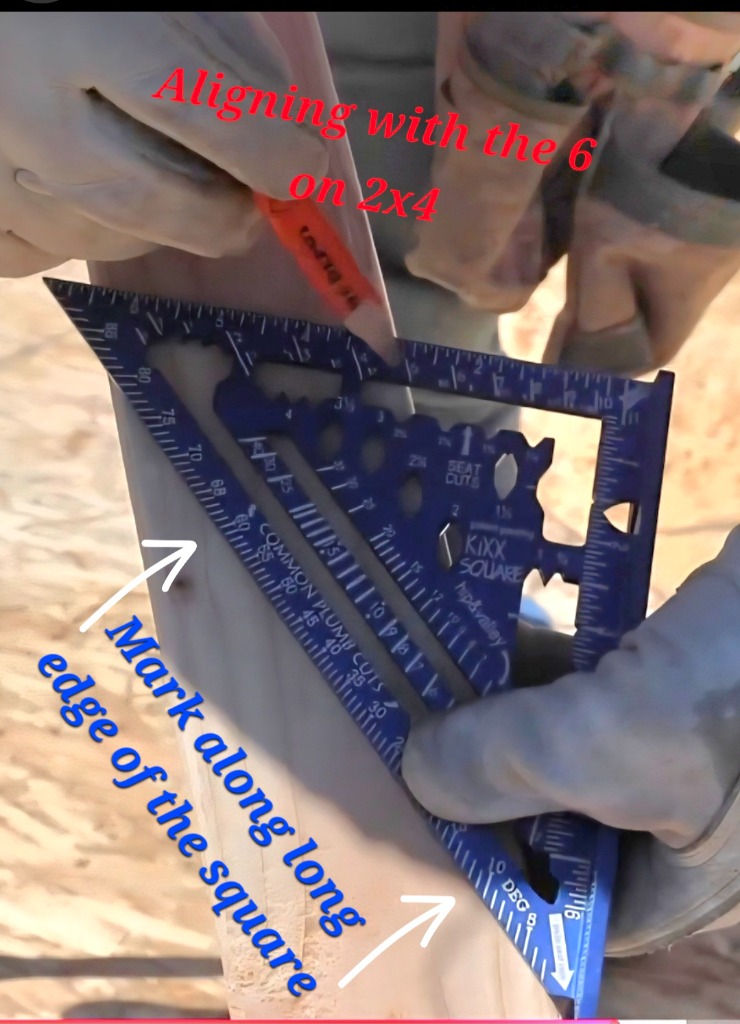
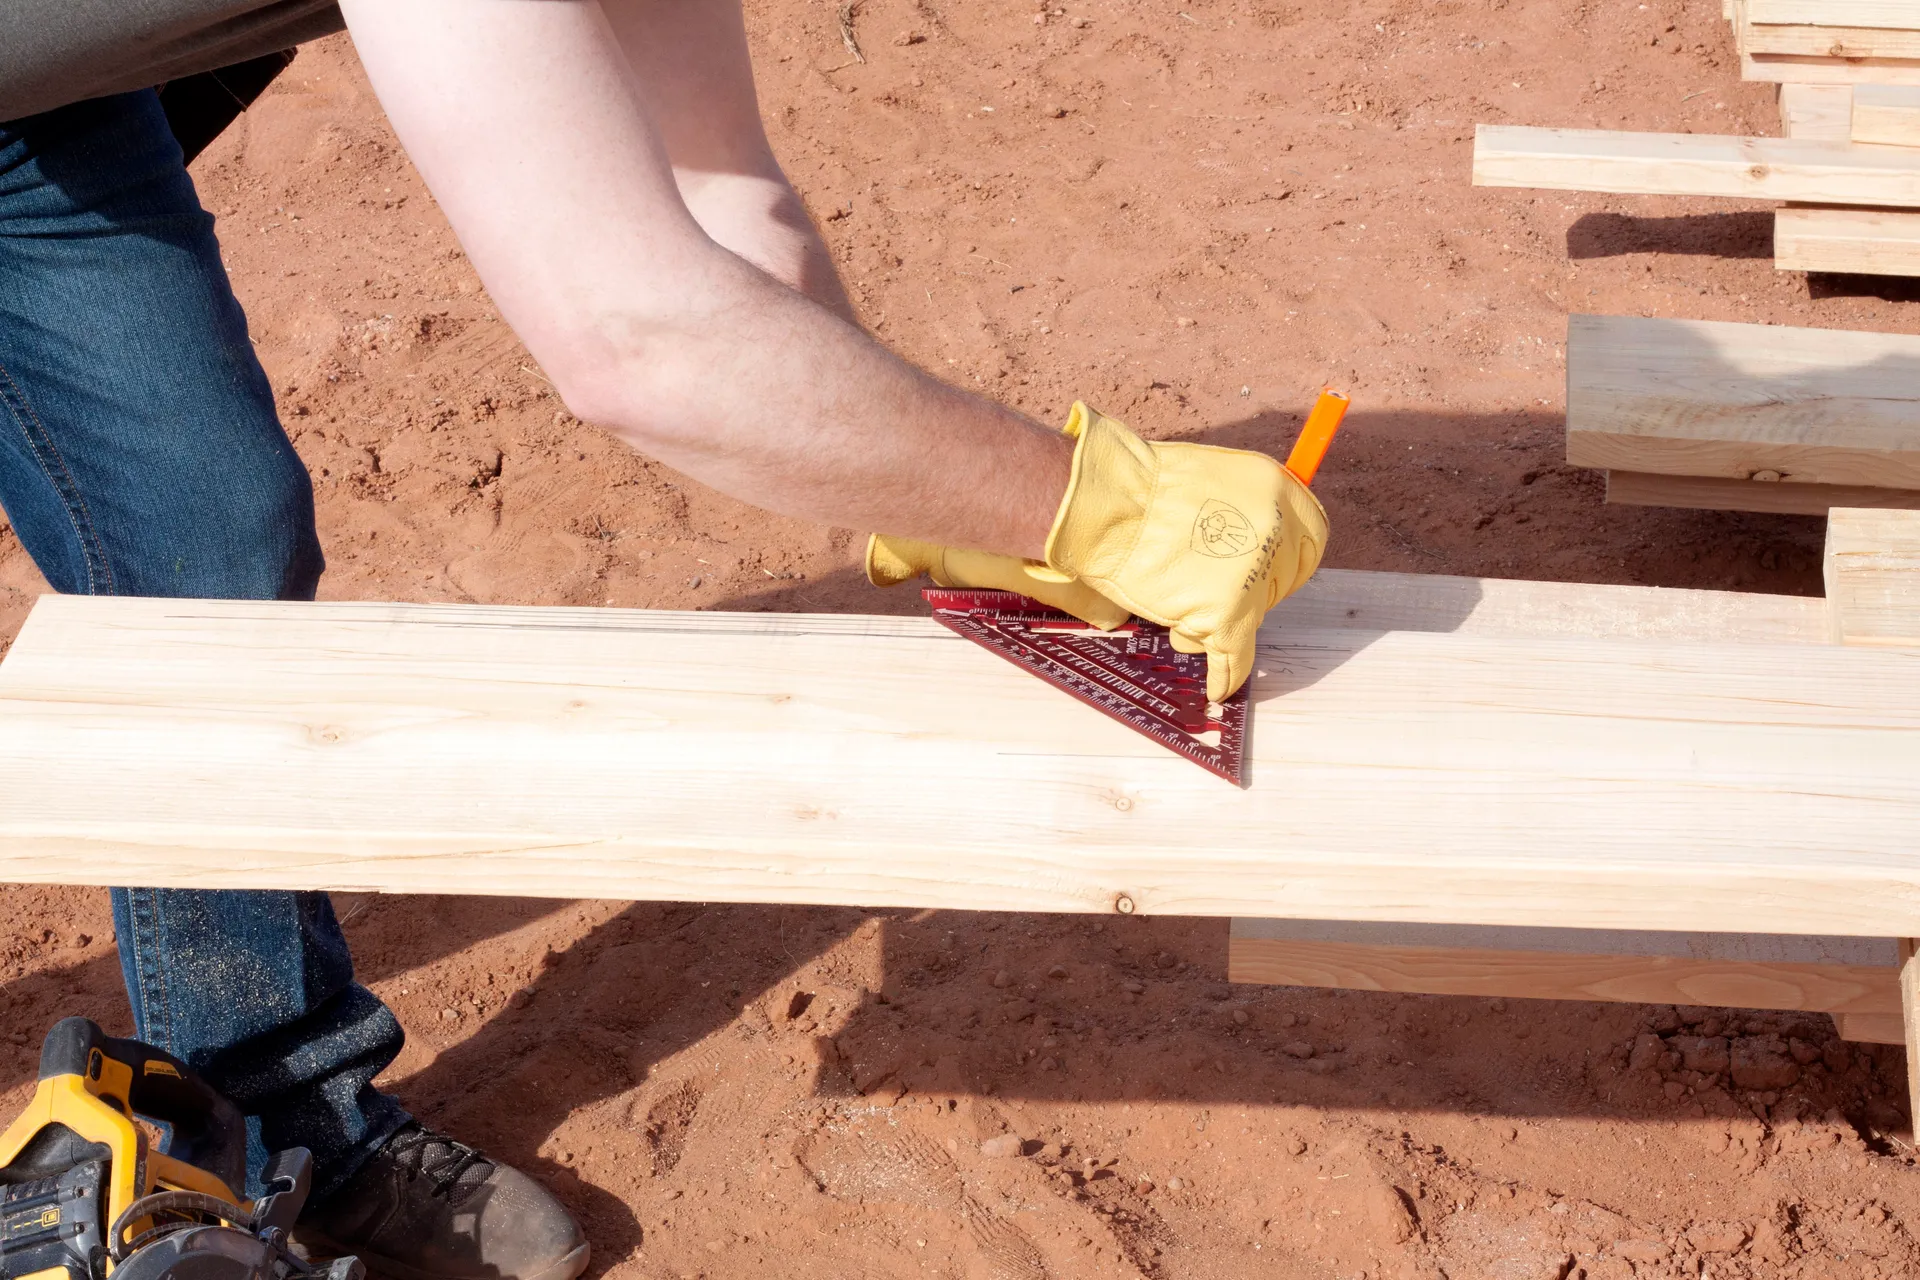
The KiXX Square features large, cut-away notches and V-grooves for rapid stud layouts.
Steps:
- Place the KiXX Square flat on your 2x4 or 2x6 (your "work piece").
- Use the large, built-in notches at 3½" and 5½" to quickly mark the widths of 2x4s and 2x6s.
- For other common layout marks (like trimmer studs), use the "V Groove" path. It has specific marks at 1½", 3", and 4½" for you to place your pencil.
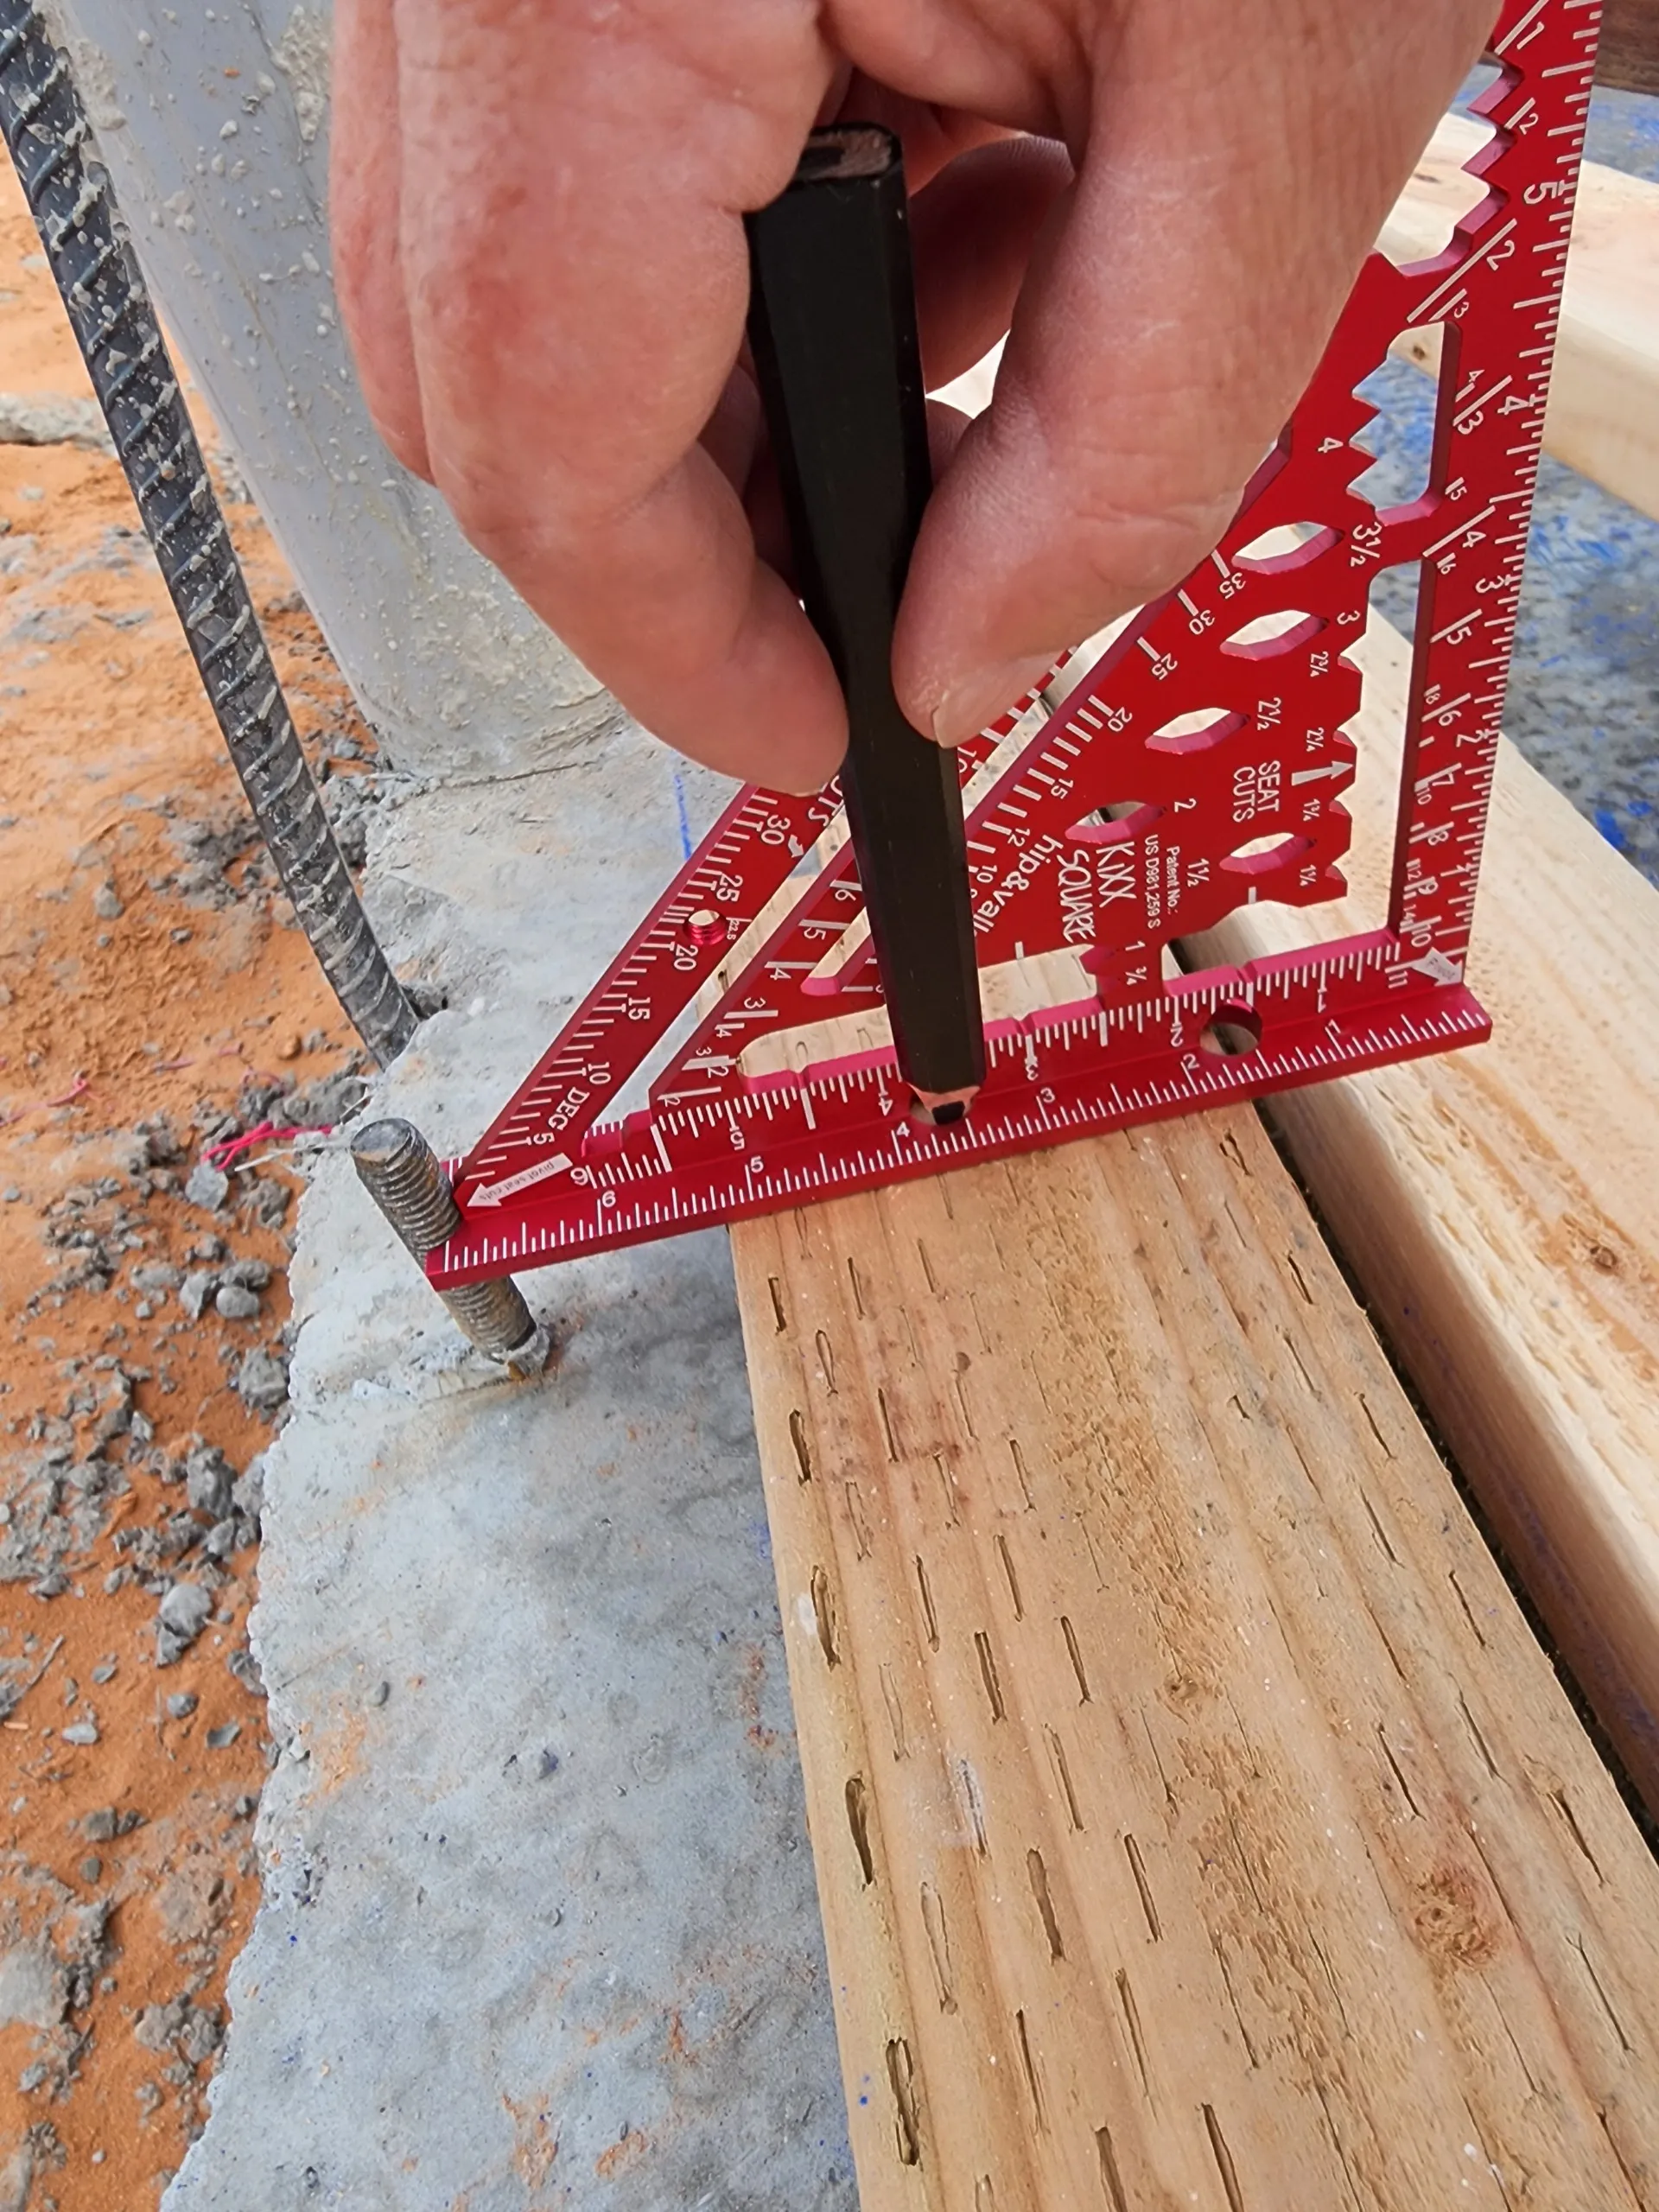
The KiXX Square has a notched spine that fits around the anchor bolt, letting you mark the exact center.
Steps:
- Place your 2x4 or 2x6 "work piece" on the foundation next to the anchor bolt.
- Stand the KiXX Square on its thick edge (the "spine"). The spine is notched (or "coped") to fit snugly around the bolt.
- With the spine held against the bolt, find the hole that matches your material (3½" for 2x4 or 5½" for 2x6).
- Push your pencil through the correct hole to mark the exact drill position.
Our Progressive Scribe feature makes it simple to draw lines parallel to the edge of a board.
Steps:
- Hook the thick edge (the "spine") of the KiXX Square tight against the edge of your work piece.
- Find the groove or slot for the measurement you need (from ¼" to 5¾").
- Place your pencil into the desired slot (for example, 1½").
- While keeping the spine tight against the wood, slide the square to mark your line.
The removable ¼" threaded pin acts as a physical stop to get an immediate 22.5° angle or 5/12 roof pitch.
Steps:
- Identify the ¼" threaded pin—a removable pin that can be screwed into a stationary position.
- Hook the square's spine over the edge of your work piece.
- Pivot the square until the threaded pin makes firm contact with the top, flat edge of the wood.
- Trace your "Scribe Line" along the square's long (hypotenuse) edge for a perfect 22.5° angle.
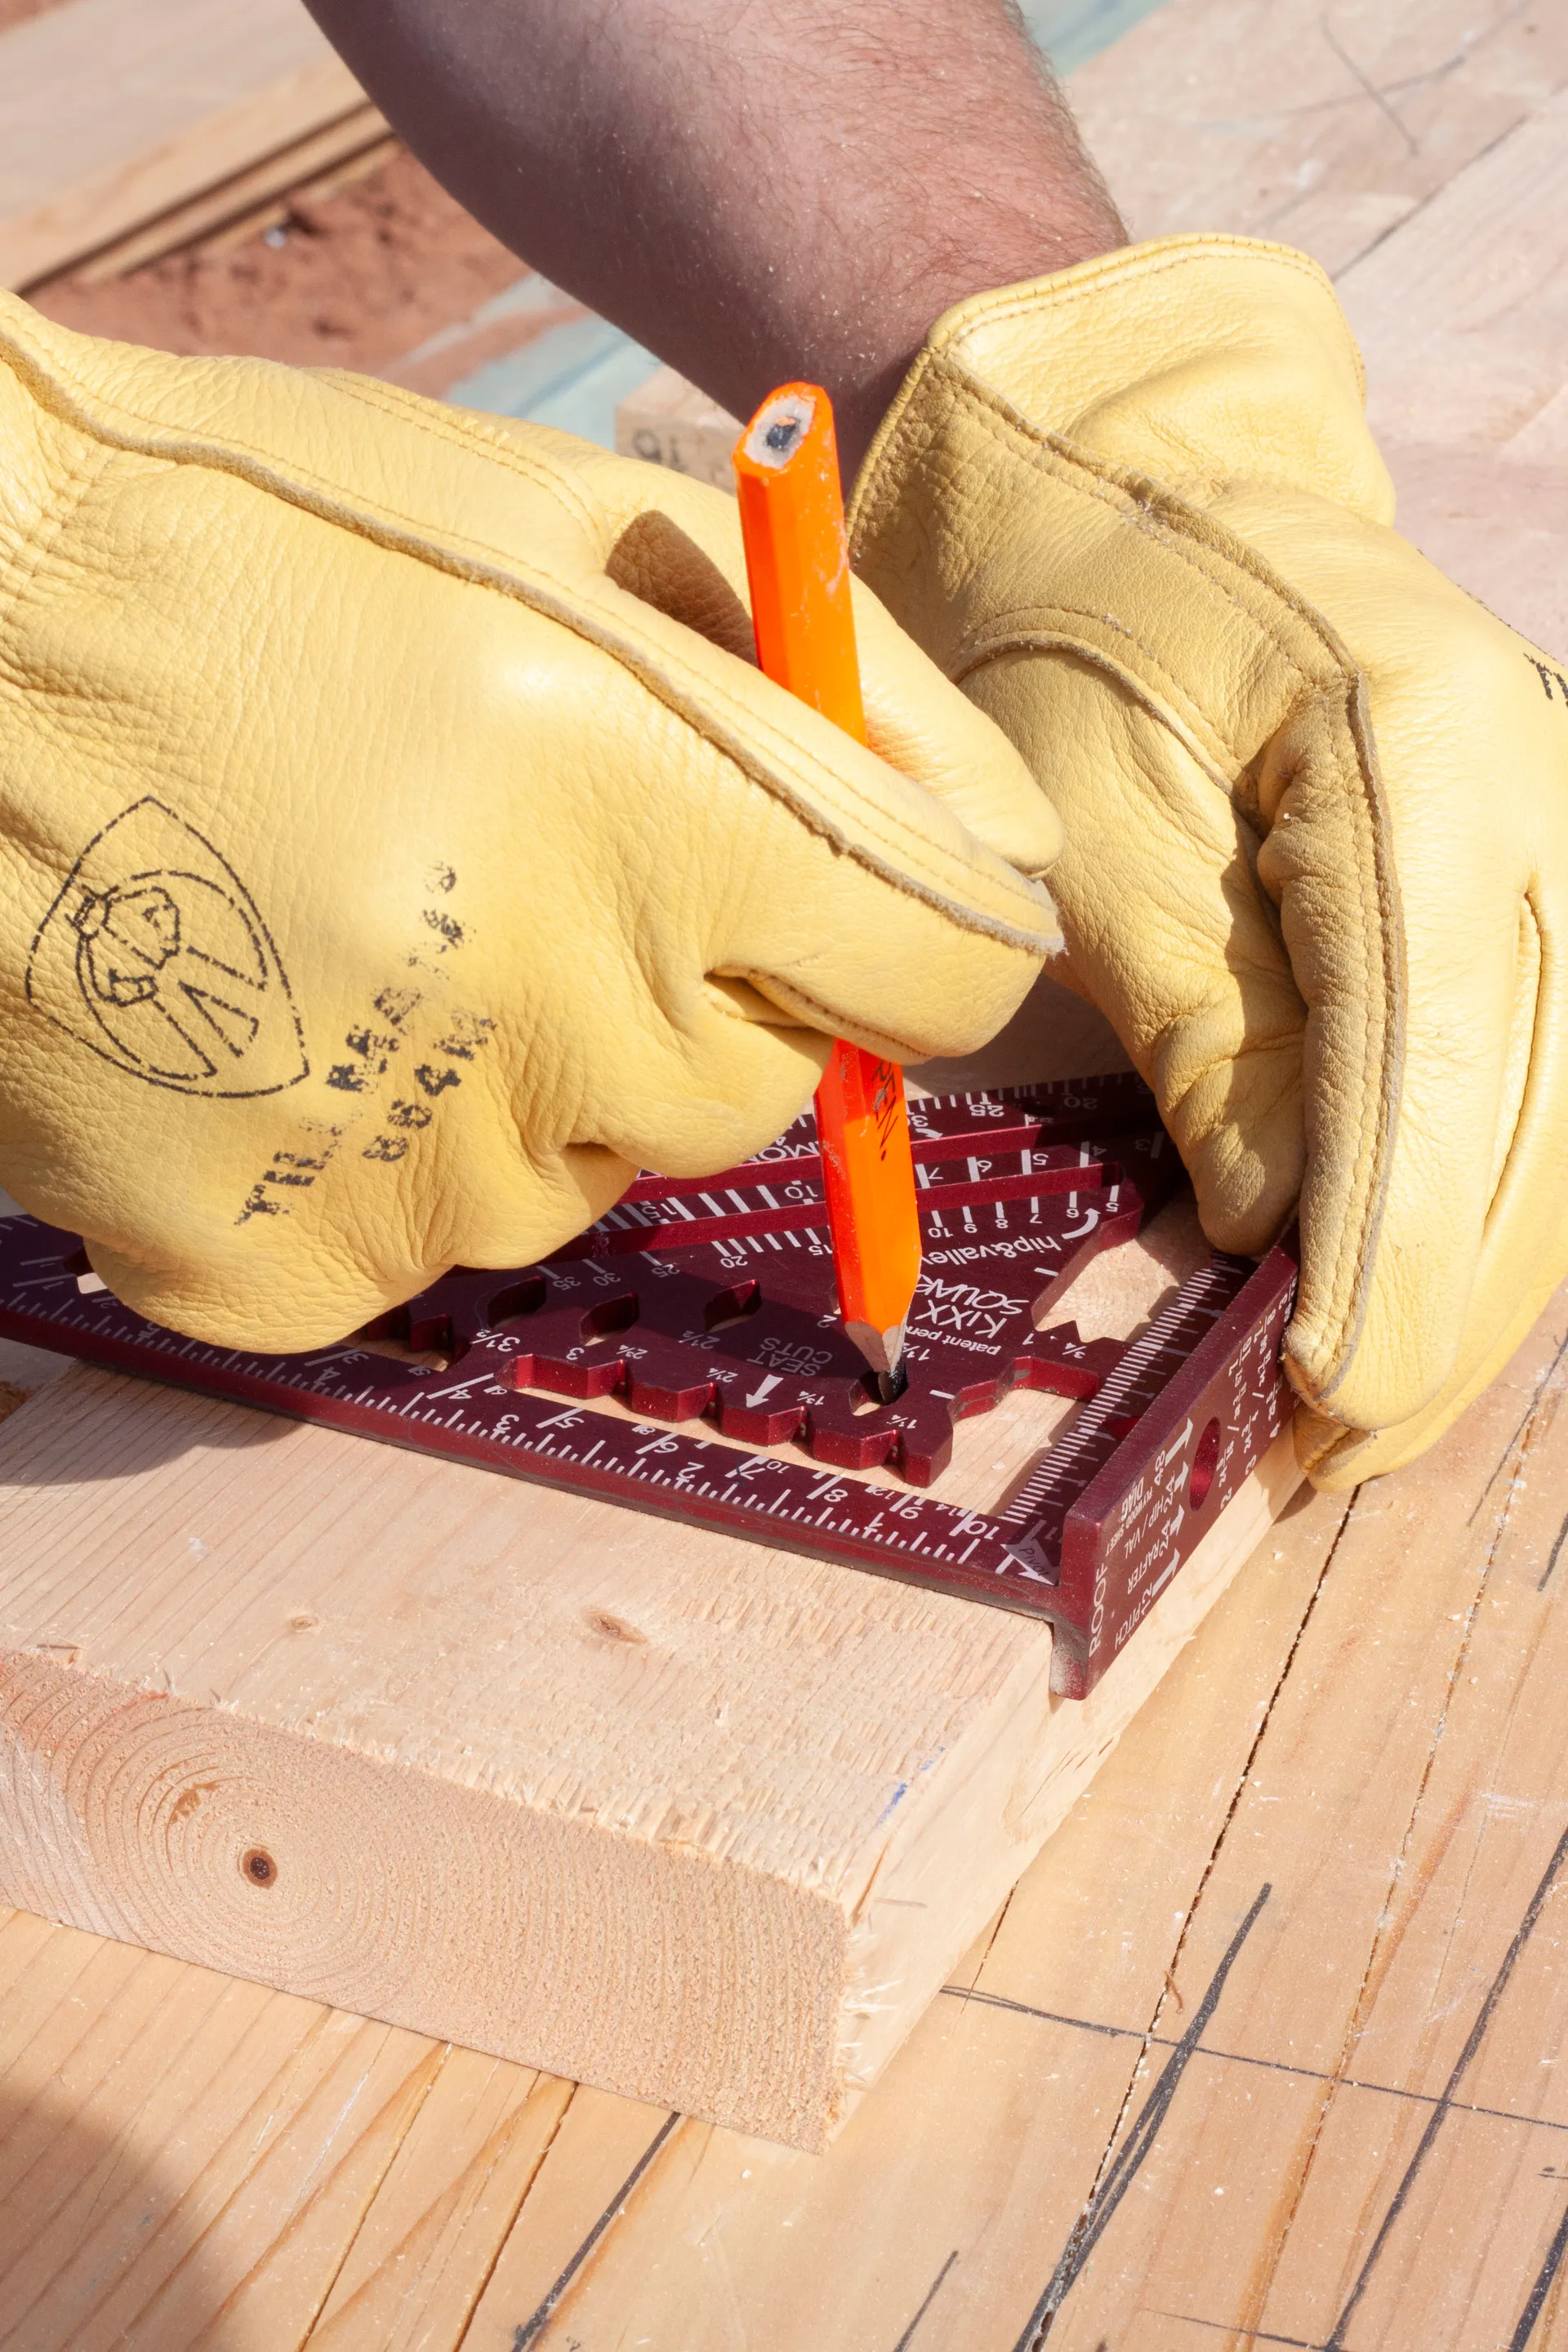
Marking a perfect bird's mouth is no longer a multi-step process with our "Hip & Val" system.
Steps:
- Determine the location of your cut. Place the "Seat Cut Pivot" point on this mark.
- Pivot the square until the "Hip or Valley SMALL marks" align with the top edge of the board (e.g., 5/12 pitch).
- Once aligned, trace along the square's long, flat edge to mark your horizontal "Seat Cut line".
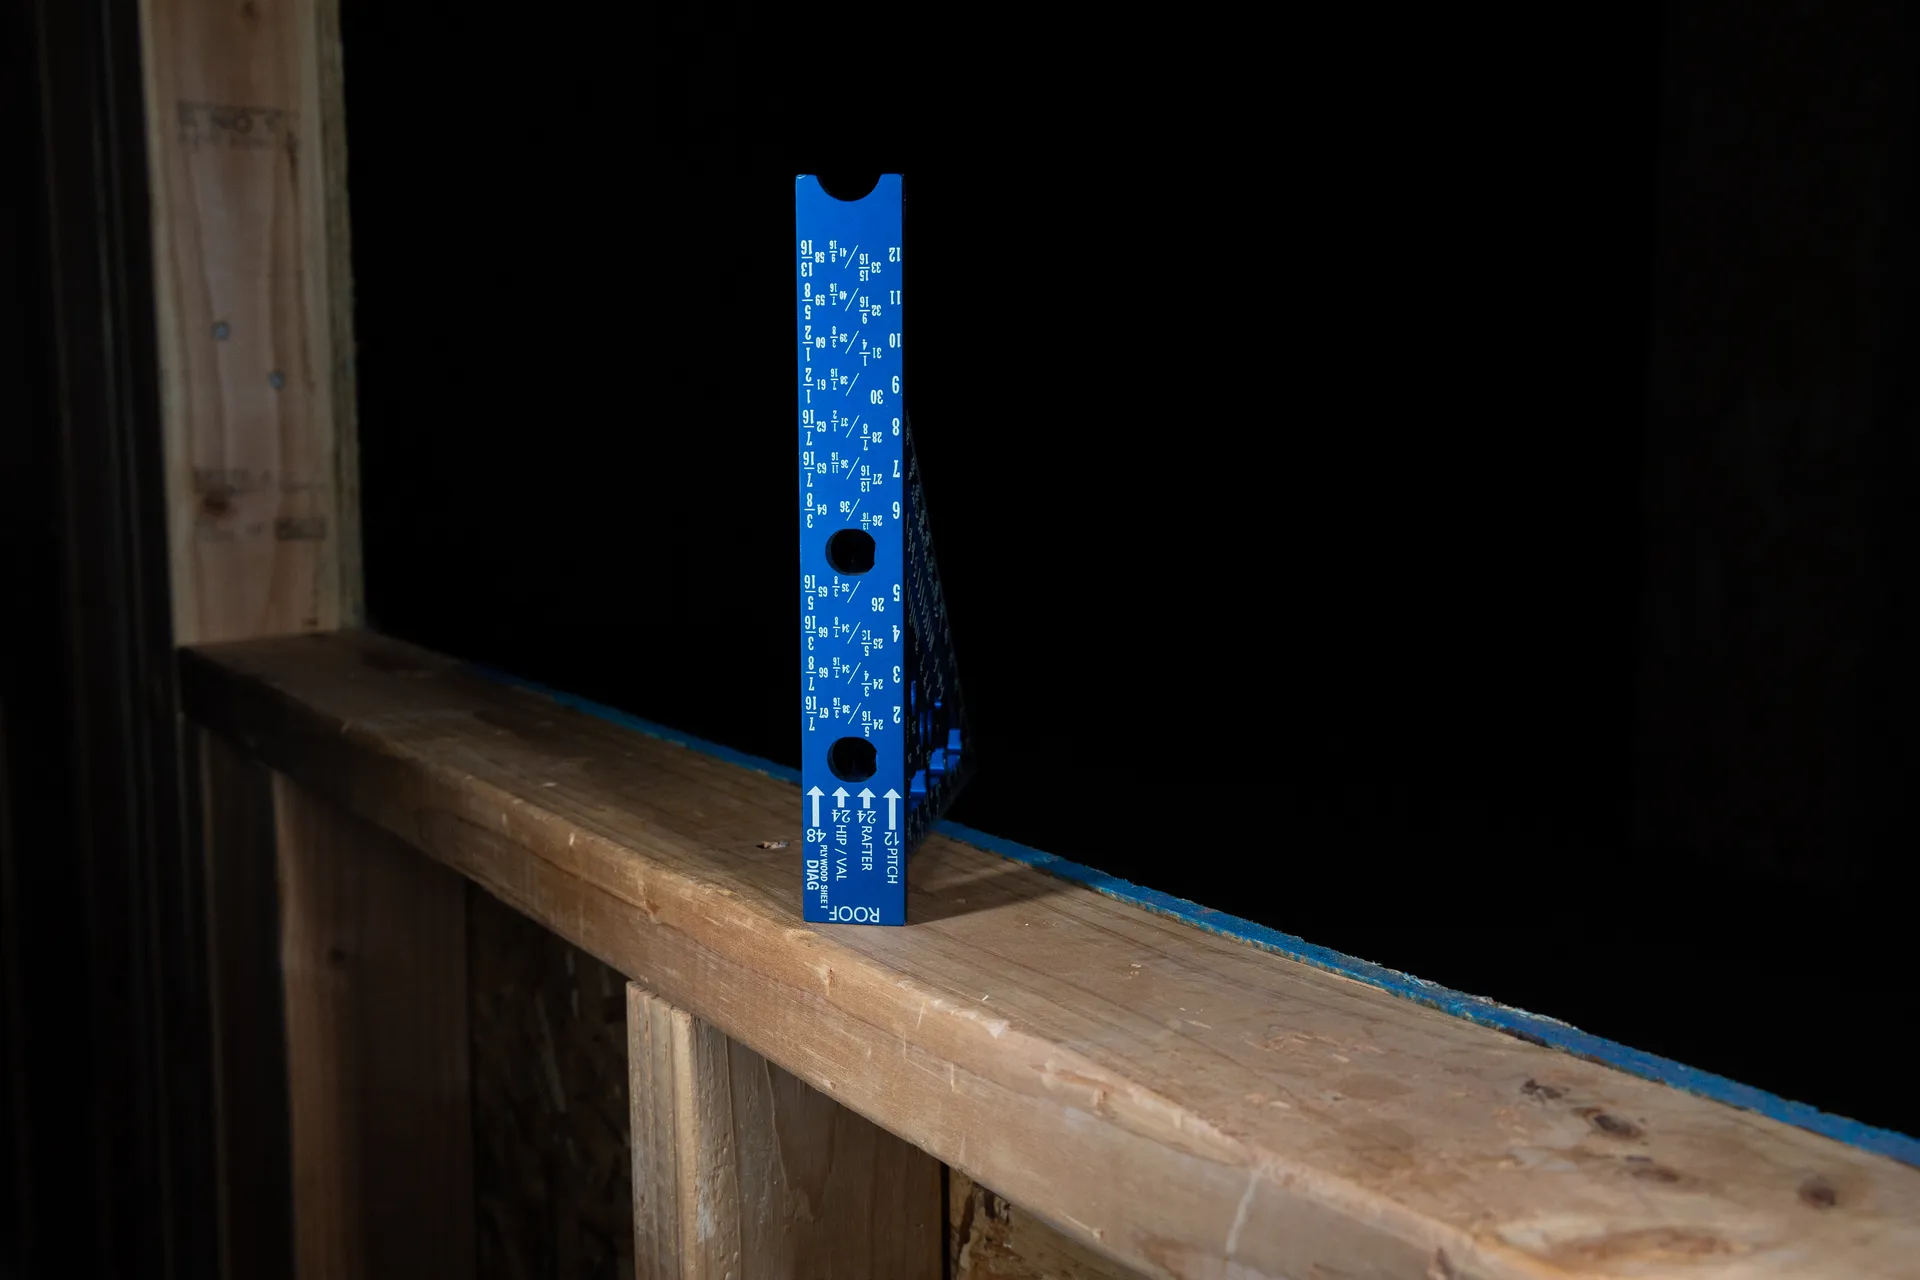
The spine of the KiXX Square is etched with the complex roof geometry tables you actually need on the job.
Steps:
- Look at the thick edge, or "spine," of the KiXX Square.
- Align the specific mark on the spine with the edge of your lumber.
- Read the data you need direktly: Rafter Length +/- @ 24" O.C., Hip/Val Layout, or 48" Sheathing Cuts.